Thursday, February 23, 2012

A Month of Food Blogging (12 of 28) : Love like salt (or, chemistry in action)

Well, that was exciting. In the last month, my laptop started overheating due to a bum fan, my grandfather passed away, I passed my qualifying exams (I am a doctoral candidate!), my daughter started teething, and in general, the universe threw me a series of curve balls. But the laptop is fixed, the exams are passed, the daughter is well stocked with cold teething rings, and I'm ready to get back to this project. I'm clearly no longer aiming to do 28 posts by Feb 28th (that would require a time machine), but we'll still aim for 28. (29, really, as I plan to do a retrospective on lessons learned at the end.)

Today, I'd like to branch out a bit from recipes, and talk a bit about sodium. And time. And the beautiful things that sodium can do for you.


Sodium gets a bad rap for a variety of reasons. It's often used in lieu of other, more flavorful, ingredients, in order to make cheap things tasty (both as salt, and in conjunction with glutamates, as MSG). It has a reputation for causing high blood pressure and heart disease. (An undeserved one, by the way. Check out the Cochrane Report on salt and hypertension for the current state of medical science. In summary, it does have minor effects on blood pressure, but only on the order of a point. And a reduced sodium diet can lead to increases in cholesterol and triglyceride levels, which are rather more strongly correlated with heart disease than blood pressure.) However, it can still have bad effects on the kidneys in large amounts. Given all that, a lot of people over-react, and try to avoid salt entirely.

I don't advocate going off and eating salt by the tablespoon, and most pre-prepared foods have far more salt than they need. However, when you're scratch cooking, a little salt at the right time can do wonders for your cooking.
  • Salt is tasty
  • Salt is a natural preservative
  • Salt is a meat and vegetable tenderizer
  • Salt softens beans and helps them cook faster
  • Salt makes bread dough more elastic
  • Salt makes eggs more tender

Let's wander down the garden path of chemistry for a bit, and talk about why some of these things are all true. Salt is composed of sodium and chlorine, in an ionic bond. However, like some couples we all know, all it takes is a little liquid, and the bond becomes very weak, breaking the salt into a sodium and a chlorine ion (charged particle). Now, sodium and chlorine are both notoriously promiscuous and will cheerfully glom on to anything that will have them. (I'm going to run this metaphor for all it's worth!) When you put salt in bread, the sodium will happily hook up with the gluten, and cross link it, so that many long chains of gluten are stuck together in a matrix (kind of like a snarl in hair). This strengthens your bread dough, and lets it rise to fluffier heights. (Ever notice how Italian bread is usually flatter and denser than a French baguette? That's at least in part due to the low salt content of traditional Italian breads.) When you add salt to eggs, it also sticks to the proteins, but egg proteins don't link to each other as well when there's a sodium in the way (unlike gluten), so they can't form a tight mesh to get all stiff. Thus, adding salt creates very tender eggs. (And is why you never salt a meringue, because it won't set properly.)

When you add salt to vegetables, a slightly different set of things happens. Vegetables have a bunch of water. but it's normally all locked up in the cells. The salt sets up what's known as osmosis, and begins to suck water through the cell membranes. In the case of veggies, it means that they start to soften, as the water is pulled out, without having to rupture the cell walls and make the vegetable mushy (as boiling does.) This is part of why pickles have the texture they do, as the salt softens the pickled vegetable while still preserving a bit of texture and crunch.

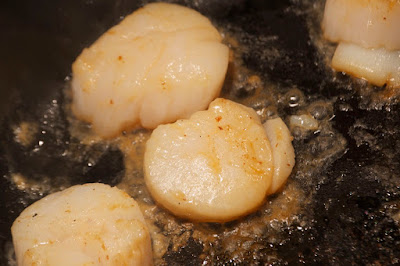
In the case of meat, something even more magical happens. If you salt meat and let it sit for just a few minutes, or cook it right away, the salt will pull all the water out of the meat, just like it did the veggies. This is terrible. The muscle fibers get very dense, the meat gets very dry and chewy, and it's impossible to brown the meat, because it's leaking water. This is why you don't salt meat during cooking if you're using a fast cooking method, like searing. However, if you let the salt sit for a while, the meat begins to draw the water (and salt) back in. According to the eminent Harold McGee, this is due to reverse osmosis, but I've never been able to figure out where the pressure for RO would come from. It matters not. What matters is that if you salt your meat early (like 6 hours early), you will have incredibly tender, juicy meat, because the salt begins to break down the muscle fibers, while holding the water in, and the salt will permeate all of the meat, instead of sitting on the surface. This is the secret to dishes like confit (which I will talk about in my next post.) A long salting process allows the meat to become very tender, and then it's followed by a low and slow cooking process in oil, so the oil can displace all the remaining water without toughening the meat again.

There's many more applications for sodium (I haven't even gotten to beans, and why a little salt and a pinch of baking soda is the best way to cook beans), but this post is running a bit long, and it's late, so I think I'll save it for another day.

Sunday, February 12, 2012

A Month of Food Blogging (11 of 28) : In which your author attempts Kadu with meat sauce and only sort of succeeds.


I had some bad family news earlier in the day, and Husband had been working over the weekend (and was unavailable for photography duties), so I was a little off my game. I considered simply not writing this one up, but thought the process of recovering this meal from disaster might be educational, or at least entertaining.

Kadu (technically Kadu Qima, since I am making it with meat sauce) is a traditional Afghan dish, made with pumpkin. However, Afghani pumpkins are apparently much more flavorful than American pumpkins, so it's common to see people make it with the more meaty butternut squash. It's essentially roasted squash with a bolognese over the top, finished off with a dollop of yogurt-mint sauce. I often make a cheater version of this, starting with canned spaghetti sauce, which is also quite delicious. However, I decided to get all fancy, and do a proper kadu, starting from this recipe and this recipe. Getting fancy may have been my first mistake. Read on.

Butternut kadu


Servings: 2
Time: 23 minutes
Planning Ahead: None
The Funny Stuff: Garam masala, ginger, other exotic spices
Virtues: Fast, high in vitamin A, low fat, reasonable sodium content.
Downsides: None. It's awesome.
Calories: 395

Ingredients
1 small butternut squash
1/2 lb ground beef or lamb
1/2 tsp salt
1 onion. If you, um, had an onion. Crap.
2 cloves garlic, crushed
2 cubes prechopped ginger, or 1/4 inch of fresh ginger
1/4 tsp cloves
2 tsp coriander
1/2 tsp turmeric
a couple whole cardamom, or 1 tsp ground cardamom
1 tsp garam masala
1 14 oz can diced tomatoes
6 oz plain yogurt (preferably low fat Greek)
1 tsp dried mint
1 clove garlic
1/2 tsp salt


Directions
Set out your ingredients. Realize you have forgotten to buy onions for the third time this week, even though you JUST went to the grocery store to buy yogurt for this recipe. Swear like a sailor, causing both your infant daughter and husband to look at you with deep concern.


Shrug your shoulders, aiming for Gallic insouciance. Chop your squash into rounds. Pop it into a microwave safe dish and microwave it for 8 minutes. Preheat the oven to 350 degrees.


While the squash is microwaving, start your ground beef browning in a skillet with 1/2 tsp salt sprinkled over. When the squash is done in the microwave, put it on a cookie sheet, and pop it in the oven with a 15 minute timer.


If there were an onion, you would now add it, chopped, and brown it with the meat. But there is no onion. Hunt around your cupboards in case there is an onion that has materialized, in amongst the teething biscuits and cheerios. In desperation, fish out some green onions from the fridge. Chop them finely. Add those, along with some spices, the 2 garlic cloves, the ginger, and the canned tomatoes.


Stir that all together. Decide that the green onion just isn't going to cut it. Add a metric boatload of onion powder. (Which is slightly smaller than an imperial boatload, as determined at the Treaty of Calais in 1889, after the British navy forcibly proved that their ships were, in fact, larger than the French ships, and demanded that the French not call them "boats" any more. (OK, I may have made that last bit up)). Stir everything together, and let it simmer.


While it is simmering, add the garlic, mint, and 1/2 tsp salt to the yogurt. Stir it all together and let it sit so the flavors can meld.


Taste your pretty, pretty sauce.


Discover that it is tragically bland. Swear some more, but softly, and in a foreign language this time, so as not to teach the baby bad words. Add more of everything. (Bringing us up to the totals described in the recipe.)


Simmer some more, and discover that it is now delicious. When the squash is done baking, pop it onto a plate, cover it with meat sauce, and a dollop of yogurt.


Sit down to eat your tasty meal, only 23 minutes and 5 swear words later. Baby had some of everything, and loved it.

Photo credits to Aleatha Parker-Wood.

Saturday, February 11, 2012

A Month of Food Blogging (10 of 28) : Seafood Carbonara


This recipe is very rich, but it's fast and delicious. We usually eat it with a hefty green salad. You can also eliminate the bacon all together (it's only about 40 calories per serving, but perhaps you're watching your saturated fat, or keeping kosher), and substitute olive oil for the bacon fat. If there's no bacon, I like to add some smoked salmon or trout to bring the smoky flavor back in.

Seafood carbonara


Servings: 2
Time: 15 minutes to thaw seafood, 15 minutes to cook
Planning Ahead: None, unless you want to thaw the seafood in advance.
The Funny Stuff: Block parmesan (or good quality pregrated parmesan)
Virtues: Fast, high in omega-3s
Downsides: Lots of fat from cheese and eggs, high cholesterol from the shrimp, lots of carbs.
Calories: 446

Ingredients
4 oz angel hair pasta, dry
2 oz parmesan
2 eggs
1 Tbsp parsley, chopped (optional)
1 slice bacon
4 large scallops
4 large shrimp
3 cloves garlic

reserved pasta water


Directions
If the shrimp and scallops are frozen, then thaw the shrimp and scallops in a ziploc in warm water. While the seafood is thawing, bring 4 cups water to a boil.

While the water is heating, shred the parmesan in the food processor. Crack the eggs over the shredded cheese, add the parmesan, and stir everything thoroughly.


When the water comes to a boil, add the pasta. Set a pasta timer for 12 minutes. Brown bacon over medium heat.


When the bacon is browned, remove it from the skillet, and add the seafood to the bacon fat, turning it every few minutes.


When the scallops are starting to crack, and are no longer translucent, the seafood is done.


Crush the garlic in with the seafood, and stir. Reduce the heat to medium low.


The pasta should be done at this point. Drain the pasta, reserving about a half cup of pasta liquid. Toss the pasta in the skillet with the seafood. Crumble the bacon over the top, and toss the noodles to coat them in the bacon fat and seafood juices.


Turn off the heat, and immediately, while the pan is still hot, add the egg and cheese mixture on top of the pasta. It needs to be hot enough to cook the egg and cheese, but not so hot that the egg cooks before it coats the pasta. Stir thoroughly.


Once the egg is incorporated, turn the heat on low again. Add the reserved pasta water (which should still be hot) a tablespoon at a time, stirring, until the pasta sauce reaches a creamy consistency.


I like mine moderately creamy, so I added about a quarter cup, but it's entirely a matter of taste.


Enjoy!


Photo credits to Aaron Wood and Aleatha Parker-Wood.

Friday, February 10, 2012

A Month of Food Blogging (9 of 28) : Smoked Paprika Chicken


When I was pregnant, one of our friends gave us a book called Hungry Monkey: A Food-Loving Father's Quest to Raise an Adventurous Eater. The jury is still out as to whether we'll succeed in making our offspring an adventurous eater (the twos are yet to come), but in the mean time, the book was good for a lot of chuckles, and some excellent recipes. This recipe started off as a Hungry Monkey recipe, but as usual, I've added my own spin on it.


Smoked Paprika chicken


Servings: 2-4 (calories listed for 4)
Time: 10 minutes prep, 5 or more hours cooking, optional 20 minute reduction
Planning Ahead: Needs to be started in the morning.
The Funny Stuff: Smoked paprika, canned tomatoes
Virtues: Low fat, lots of vegetables, high in vitamin A.
Downsides: Stains like mad. Wear an apron during the reduction phase.
Calories: 269

Ingredients
4 chicken thighs
1 carrot
1 celery stalk
1/2 onion
2 tsp salt
Pepper to taste
3/4 cup red wine
1/4 cup smoked paprika (no, that is not a typo. 1/4 cup.)
1 can diced tomatoes
1 Tbsp tomato paste (optional)

Directions
Lay the chicken thighs in a single layer over the bottom of your crockpot, and add the chopped vegetables.


Add your salt, paprika and wine, and canned tomatoes.


Give it a good stir to mingle everything, including flipping the chicken a couple of times. Set your crockpot on low, and cook for at least 5 hours.


At this point, you have a very tasty dinner, suitable for a work night.


However, if you're a bit of a perfectionist, or throwing a dinner party, do the following. (While wearing an apron.)

Add the tomato paste to a pan.


Toast it over medium heat, stirring occasionally, until it starts to caramelize.


Strain the sauce through a colander into the pan, leaving the veggies behind.


Turn the heat up to high, and reduce the sauce by at least half, stirring occasionally.


Drizzle it over the chicken and vegetables. (No photo available, we were ravenous by this time.)


Photo credits to Aaron Wood and Aleatha Parker-Wood.

Thursday, February 9, 2012

A Month of Food Blogging (8 of 28) : Asian pulled pork sandwiches


I'm a fiend for variety, so I love this kind of remixing of ingredients. Once reduced, the braising liquid from the chashu becomes a sort of Asian BBQ sauce, and the chashu itself stands in for pulled pork. Toss on some cabbage and green onions, for sort of a cole slaw vibe, and suddenly you're serving southern food with an Asian twist. The hot braising liquid wilts the cabbage a bit, which I like. It's a bit too much crunch, otherwise.


Asian pulled pork sandwiches


Servings: 2
Time: 15 minutes
Planning Ahead: Needs chashu and the leftover braising liquid
The Funny Stuff: No funny stuff
Virtues: Fast, lots of cabbage
Downsides: Refined carbs from buns, fat from pork
Calories: 496

Ingredients
4 oz chashu
Leftover chashu braising liquid
2 sandwich rolls
1 cup shredded cabbage
1 green onion, chopped

Directions
Pour the leftover braising liquid in a pan, and set it over medium high heat. You may also wish to strain it, to remove the peppercorns and ginger, but I always forget, and honestly, I kind of enjoy the little pops of ginger in the final product. The peppercorns are a bit much, though. Someday I will remember to wrap them in cheesecloth during the initial braising.


Finely shred the cabbage with a knife or food processor.


Toast the buns in a lightly buttered skillet. Or under the broiler, or in a toaster oven. We're non-judgmental here.


Once the buns are toasted, lay 2 oz. of thinly sliced pork on each bun, along with 1/2 cup of cabbage, and some green onions.

When the braising liquid has reduced enough that it's starting to form sticky bubbles, and is looking slightly caramelized, remove it from the heat.


While it's still hot, pour it promptly onto the cabbage to wilt it.


Enjoy!

Photo credits to Aaron Wood and Aleatha Parker-Wood.

A Month of Food Blogging (7 of 28) : Smoked fish and citrus salad


This salad is a nice tangy, smoky salad, perfect for the spring-like weather we're having today. I ate it almost constantly when I was pregnant.

Dinner salads are deeply underrated things. For starters, there's often no cook time involved, just chopping time. When there is cooking, it's often something fast. (For instance, skirt steak salad is a popular one at our house, but it takes less than 10 minutes to pan-sear skirt steak.) They're generally quite healthy, especially if you make your own dressing, as I've done here. This is often a meal in itself, but if you're a little bit hungrier, some bread and a bit of soup rounds it out nicely.

I usually don't have smoked salmon in the house (it's expensive, and I never go through it all before it goes bad). However, I find that smoked trout in a can has a lot of the same flavor, and will sit in your cupboard until you need it. It's also handy for bringing a smoky flavor to carbonaras, and tossing over rice bowls.


Smoked fish and citrus salad


Servings: 1
Time: 10 minutes
Planning Ahead: None
The Funny Stuff: Smoked trout or salmon
Virtues: Low carb, lots of veggies, high in vitamin C
Downsides: Not a low calorie salad, due to the olive oil, avocado and feta
Calories: 391

Ingredients
2 cups chopped lettuce
1 oz smoked trout or hot-smoked salmon
1/4 avocado, diced
1 oz feta
1/2 orange, diced
1/4 cup chopped bell pepper
1/2 tbsp orange juice concentrate
1 tbsp olive oil
1/2 tsp white wine vinegar


Directions
Chop the lettuce, bell pepper, and avocado. Chop the top off the orange, and then the sides, to remove the peel.


Slice it thinly, and then into cubes. (Ok, I know you know how to dice an orange, these are just gratuitous orange shots, because they made me salivate.)


Toss the veggies on top of the lettuce, and crumble the fish over.


Toss the dressing ingredients in a bowl, or a sealable container.


Whisk it or shake it until it forms a fine emulsion, such that the oil drops are barely visible.


Crumble the feta over the salad, and drizzle it with dressing.


I served it with warm baguette. The baby was napping, and sadly does not yet eat salad, but she got some avocado chunks after her nap as a snack.


Photo credits to Aleatha Parker-Wood.

Wednesday, February 8, 2012

A Month of Food Blogging (6 of 28) : Caramelized cauliflower


This one is a perennial favorite around our house. The baby adores cauliflower, and even my initially dubious husband thinks this is pretty darned delicious. The caramelization gives it a nice toasty flavor, and destroys that pesky sulfurous smell that brassica is prone to. And the browned butter with curry makes your entire kitchen smell great. (Although if you don't have curry on hand, this is pretty tasty even without.)

Microwaving it bootstraps the cooking process, making this a great last-minute dish. (And by last minute, I mean "oh shoot, the pasta is already done, and I forgot to make a vegetable.")

Caramelized cauliflower


Servings: 2 (4 if you're less greedy about your cauliflower.)
Time: 7 minutes
Planning Ahead: None
The Funny Stuff: Curry powder, garam masala
Virtues: Cauliflower! Vitamin C, potassium, B6, all that jazz.
Downsides: Butter.
Calories: 120

Ingredients
1 small head of cauliflower
olive oil or cooking spray
1 tbsp butter
1/2 tsp mild curry powder
1/2 tsp garam masala
salt

Directions
Chop cauliflower into medium chunks. Try to make sure most chunks have at least one flat surface to caramelize. Pop it in a microwave safe bowl, loosely covered, and microwave it for 4 minutes.


Preheat and oil a skillet on medium-high. When the cauliflower is done microwaving it, toss it in the skillet, and sprinkle with a pinch of salt. Cook until one side is golden brown, and stir.


Remove the cauliflower from the pan, and set aside. Melt the butter in the skillet until it starts to brown very slightly.


Toss in the curry and garam masala, and let them get nice and fragrant.


Drizzle the browned butter over the cauliflower.


We had this with fish and a mediterranean pasta toss: lemon juice, olive oil, feta, sun-dried tomatoes, etc.


And baby had the same, and loved it. (Minus the feta.)


Photo credits to Aaron Wood and Aleatha Parker-Wood.